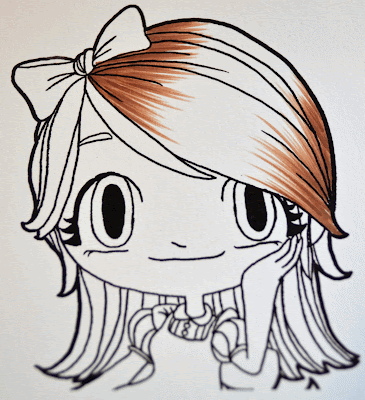
1. First stamp your image using copic-friendly ink of choice - I prefer Memento Tuxedo Black ink (or print out image if using a digital image). The image I am using is a digital image from Some Odd Girl that I cropped for a tutorial/class on coloring hair. She is called Alice Mae.
2. I start with my darkest color. In the sample below I used E25 as my darkest color. Color the deepest shadows and roots using a very light flicking motion or feathered stroke. Your strokes should always begin at the darkest part of the hair and brush outward. You should also color in the same direction as the strands of hair.
3. Take your next darkest color or your mid-tone, in this case E31, and very lightly flick from about a third of the way into the darker color toward the "highlight", covering part of the strokes you already colored.
4. At this point, I go back to the darkest color (E25) and darken up the edges again using the very light flicking motion.
5. Then I go back in with mid-tone, E31, and blend the E25 edges out using the very light flicking motion. You could be done at this point if you prefer a lot of highlights or white space. For this class or tutorial, I chose to continue on with another step.
6. For the final step I used the lightest color, in this case E50, to lightly blend out the mid-tone color E31. Again I used a very light flicking motion starting about a third of the way into the mid-tone color and flicking into the lightest area. I used very little of the E50 to blend.
7. I finished coloring the entire head of hair using the same technique throughout.

If you have any questions, please let me know. Hope to see you all coloring again real soon!
Marcy


Thank you Marcy. Great picture tutorial. I am off to practice those 'very light' strokes. Ta heaps for the inspiration. :)
ReplyDeleteGreat tutorial!
ReplyDeleteAwesome!! Thank you for sharing!
ReplyDeleteWow.. gorgeous job! I am brand new to Copic markers and this is very helpful! Thank you!
ReplyDelete