Hello all! Recently one of my students came to class with her Ciao markers all organized and color coded...my were labeled but not color coded and I was jealous! So....I went digging and found where she got her template so I thought I would share with all of you!
Thanks to Asela Hopkins from Hop Art Studio she has created a template that you can download for your Copic Ciao caps. I did this with all of my Ciao markers and I love it. Makes it so easy to find. I have listed the link here for easy access. Just click Copic Ciao Lid Label Template
Here are the steps:
1) printed on Neenah Solar White cardstock
2) additional step I did that I got from my student Yara: color each of them with the corresponding color so you can easily see what color you are getting when you pull it from the shelf
3) punched out each with a hole punch
4) used a glue dot to adhere and bam....you are done! Easy...peasy, right?
I hope to be back in the swing of things again posting cards and such. Sorry for being MIA for so long!
Big Copic Hugs!
Marcy
Saturday, July 27, 2013
Tuesday, January 8, 2013
A Little Mo Manning and Make it Crafty Love
Hello my blogging friends! You've probably thought I threw in the towel by now since it has been forever since I have posted anything, huh? Well, I am still here! Life just happened....you know family, teaching Copic classes, then the holidays came and it all became a big blur! I promise with the New Year to be much better about posting my coloring even if I don't yet have them made into a card or project yet so you at least have something to look at!
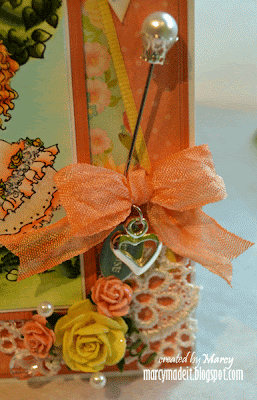
So, without further adieu, I give you one of my favorite projects I created for my in-laws to give as a gift for their friends for a 50th wedding anniversary. I used Mo Manning's (Mo's Digital Pencil) Soldier Boy and Shirley digi stamps and layered them in Photoshop Elements with Make it Crafty's Tree of Love digi stamp to create the scene. I also added in the initials of the couple on the tree to personalize it for the recipient.
List of Supplies:
Girl
Dress: YR00,YR000,YR0000, W0, W00
Shoes: E44,E43,E42,E41
Eyes: B24, B02
Flowers on dress: YR31, YR30
Hair: E50,E51,E53,E55
Skin: E00, E000, E11, R21, R30, BV34
Spica pen clear & peach
Boy
Fatigues: YG99,YG97,YG95,YG93YG91
Boots: E50, E51. E53, E55
Skin: E00, E000, E11, R21, R30, BV34
Tree trunk: E35, E25, E29, E50, E53
Tree and ground: YG67, YG63, YG61, G99, G20, YG03
Papers: My Minds Eye Miss Caroline Howdy Doody
Bazzill Cardstock
Spellbinders dies
Wild Orchid Crafts flowers & hat pin
Ribbon, lace and heart charm from my stash
So, without further adieu, I give you one of my favorite projects I created for my in-laws to give as a gift for their friends for a 50th wedding anniversary. I used Mo Manning's (Mo's Digital Pencil) Soldier Boy and Shirley digi stamps and layered them in Photoshop Elements with Make it Crafty's Tree of Love digi stamp to create the scene. I also added in the initials of the couple on the tree to personalize it for the recipient.
On the inside I added a string of pearls and shear ribbon to accent the center.
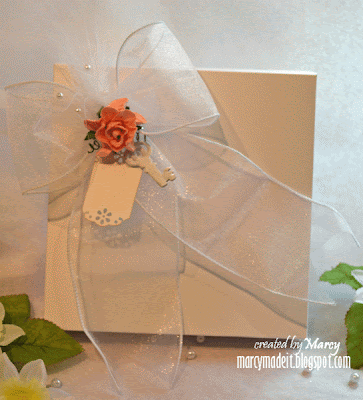
Here is the Boxelope I created for the card to be presented in. I added a chipboard key that I covered in white crackle paint, added a WOC rose, some pearls and a tag to finish off the shear white bow.
I'd like to enter this into the following challenges:
Thanks for stopping by and reading through this long post. Hope to see you again soon!
Big Copic Hugs!
Marcy
List of Supplies:
Girl
Dress: YR00,YR000,YR0000, W0, W00
Shoes: E44,E43,E42,E41
Eyes: B24, B02
Flowers on dress: YR31, YR30
Hair: E50,E51,E53,E55
Skin: E00, E000, E11, R21, R30, BV34
Spica pen clear & peach
Boy
Fatigues: YG99,YG97,YG95,YG93YG91
Boots: E50, E51. E53, E55
Skin: E00, E000, E11, R21, R30, BV34
Tree trunk: E35, E25, E29, E50, E53
Tree and ground: YG67, YG63, YG61, G99, G20, YG03
Papers: My Minds Eye Miss Caroline Howdy Doody
Bazzill Cardstock
Spellbinders dies
Wild Orchid Crafts flowers & hat pin
Ribbon, lace and heart charm from my stash
Subscribe to:
Posts (Atom)